How To Install Fish Finder?
Fish finders are ingenious devices when it comes to scoring fish in unknown waters. Most people don’t get them because they dread the installation process. When we first started out, we had multiple online guides to help install the fish finder.
Today, we are much more confident about the whole process. So, we have documented this "How to install a fish finder comprehensive guide" to help out the novice anglers.
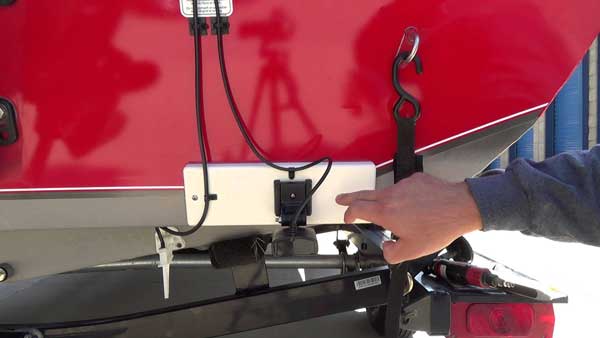
In this guide, we delve into the process of mounting the binnacle mount, i.e. the mount of the actual fish finder display and the transom mount, the most common type of transducer mount. So it will help you setup the whole apparatus and get into the water with fish SONAR data.
A few things you need to install the fish finder and the transom mount:
Fish finder:
You must find the right fish finder for yourself which in itself can be a daunting task. Fortunately for you, we have a complete fish finder buying guide and reviews of the best units in the market currently.
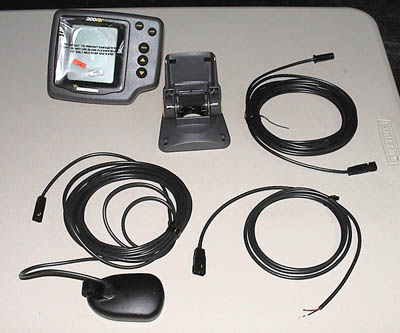
A new fish finder should be available as a kit complete with its transducer and a transom mount unless you choose to buy a standalone unit because the matching transducer is already installed.


How To Install Lowrance Fish Finder? (VIDEO TIPS)
How To Install Garmin Fish Finder? (VIDEO TIPS)
Transducer:
For new fishermen, we recommend using the stock transducer that comes with the fish finder. This will have the proper instructions and will be matched with the unit.
Only reason to buy another transducer is if you want to upgrade the original. In that case, ensure that the transducer matches with the fish finder by checking online.
You can also tell from the connections, they have to be compatible between the fish finder and the transducer.


Mounts:
Usually, the fish finder comes with the binnacle mount required to station it at the helm. The transducers usually come with a transom mount. These are plastic mounts that are easy to mass-produce and hence cheaper so they are readily available.
We explain how to install transom mounts here. But we have separate how-to guides on installing through-hull and in-hull transducers. Do note here that the same transducer can be mounted in these three different mounts based on the vessel and your requirements.
Power Drill:
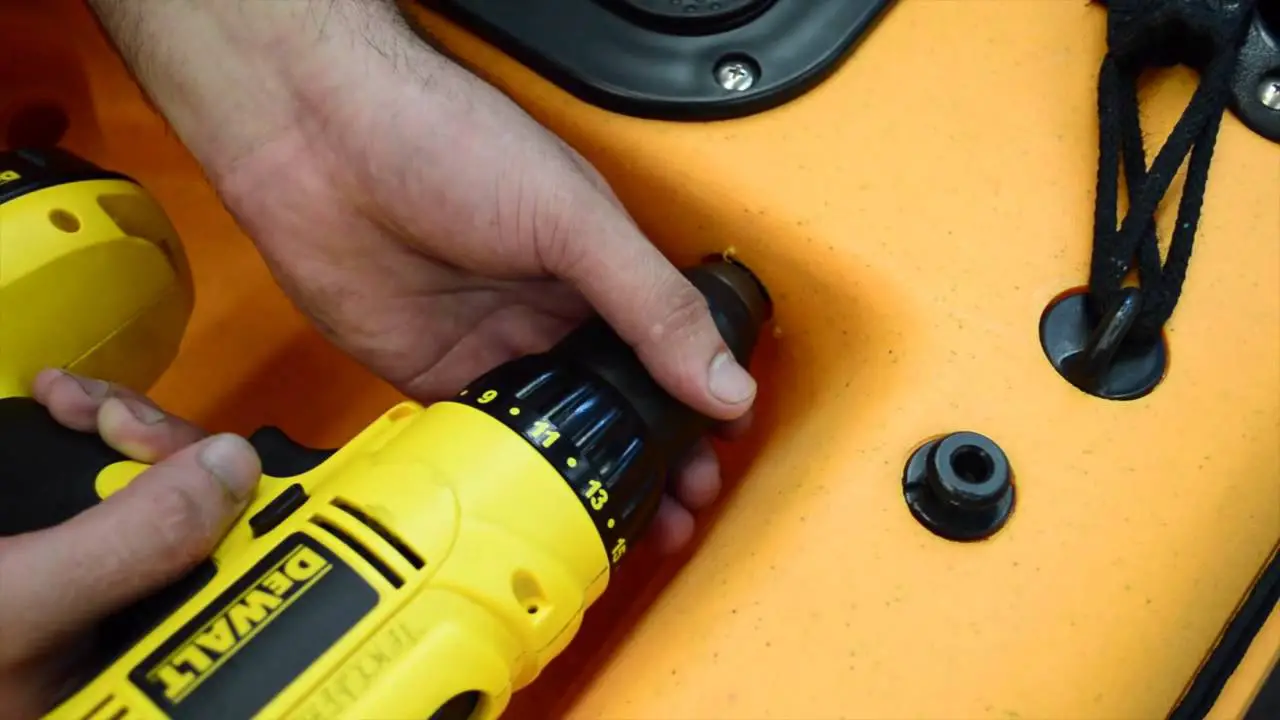
You will have to drill some holes your precious boat to mount the fish finders and possibly the transducer. The power drill is a requirement.


Silicone Sealant:
Popularly known as goop in the fish finder circles (we are kidding!), the silicone sealant seals the water out from the areas it is poured on. It has a rubbery finish. It’s important to squirt this goop around critical areas like mounting bolts so that the saltwater cannot get in there and corrode them.
Other Items:
You will get most of the items required to install the fish finder in the package including cable and template to mark the holes.
How To Install Fish Finder And Transom Mount?
Before we start off with the narrative, do understand that the fish finder kit consists of the actual fish finder and the transducer. The fish finder has the display and the controls. While transducer sends out and receives the SONAR waves that help create the images on the display.
The fish finder goes near the helm where you can see the display and the transducer is mounted at the transom of the boat in this case.
1. Connection layout:
The actual connection layout is pretty simple. The fish finder is an electronic device so it has to be connected to a power source. No, fish finders are not battery operated. So two cables, the positive and negative leads, run to the fuse box/cranking battery of your vessel.
One other connection runs from the fish finder to the transducer for relaying the SONAR information.
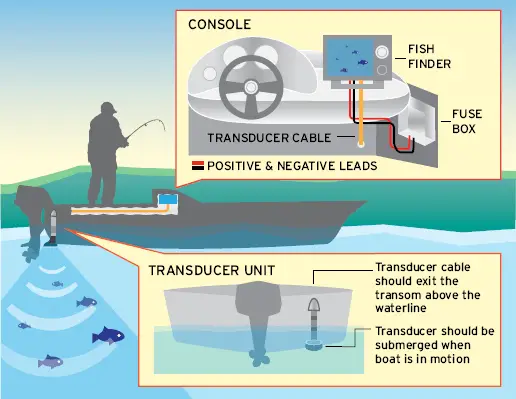


There could be other connections to a chartplotter or networking device but the initial installation requires only these two connections. If the cables run longer than required, you shouldn’t snip them off. Instead, the extra length should be secured with cable ties.
2. Installing The Binnacle Mount
The binnacle mount is the mount of the actual fish finder. First off, you need to find a place to station this. The fish finder should ideally be as close to the helm as possible so that you can look at it as your steer.
For the sailor, the fish finder should stand at chest height for easy, non-fatigued vision. You must hold the fish finder at this height and check whether you can see the display correctly without portions of the screen looking black.
Once you spot such a position to fix the binnacle mount, check that it has enough clearance. It shouldn’t get in the way of other navigating devices or the steering. And there should be enough space for the wiring.
You should also ensure that the fish finder can be easily tilted or rotated in the spot for viewing without obstructing other controls.
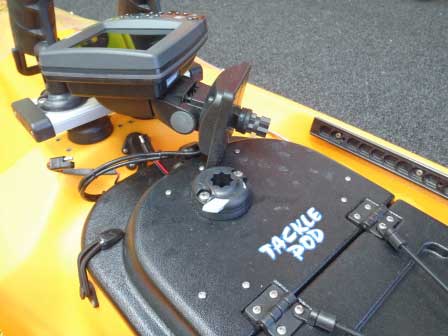
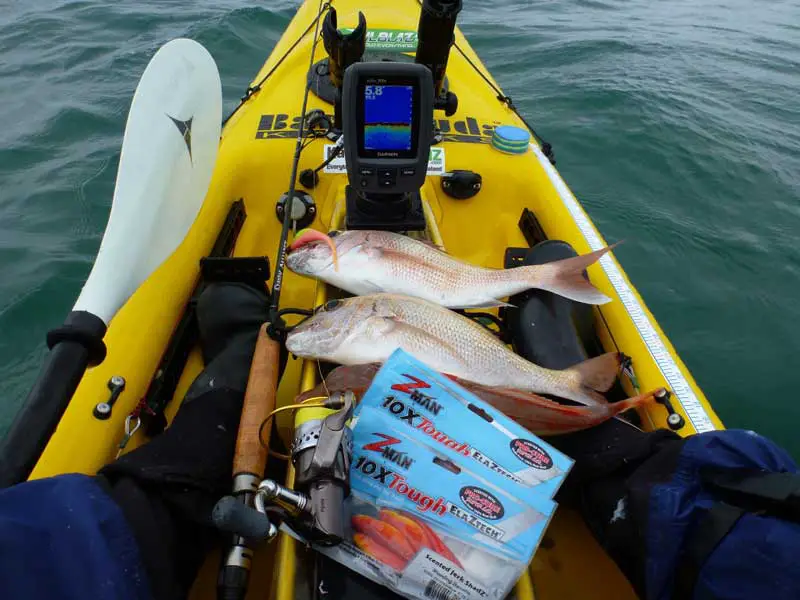
This should help you decide on a fixed location.
Now bring out the template provided with the binnacle mount for affixing it. Or else, you can just place the binnacle mount at the selected location and mark the point for drilling holes to screw it on.
You will have to mark one more hole for the exit point of the wires. Double-check that this hole is large enough for the clump of wires that should pass through it. Before making the hole for the cables, ensure that the wires won’t have to be twisted unnaturally to pass through the hole.
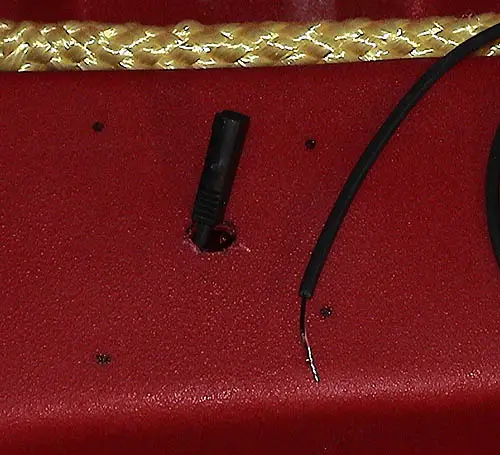


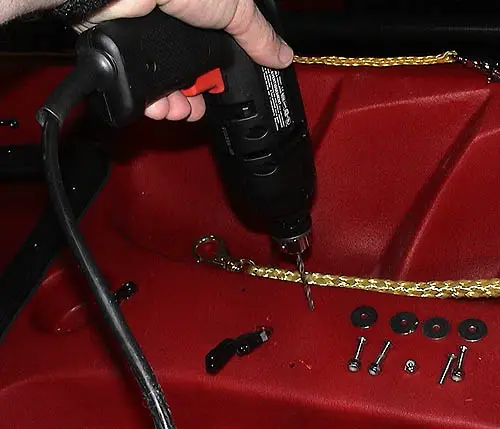
Once the holes are marked, run the power drill at full throttle for a clean hole. Slow drilling and hesitation will cause the surface to splinter. Shoot some sealant on all the holes. Pull out the clump of wires that should connect to the fish finder to fix them later.
Now on to installing the fish finder mount. You can fix the mount and screw it in with the accompanying stainless steel bolts. The finish of the bolts is important to avoid corrosion.
Fasten each bolt with an aircraft nut and a stainless steel washer for a tight fit with the wrench that came with the fish finder. Squirt more sealant on the bolts after this to completely seal them off against moisture.

Next, you must attach the wires to the designated plug head of the fish finder. This plug head should be placed on the base of the binnacle mount. Once these are properly affixed, you would know what length of connecting cable should be above the surface from the cable hole.
Stick duct tape under the mounting region and cut out a hole in it around the cable hole. From the top of the surface pour some silicone sealant around this cable hole. The duct tape keeps it from dripping below the helm.
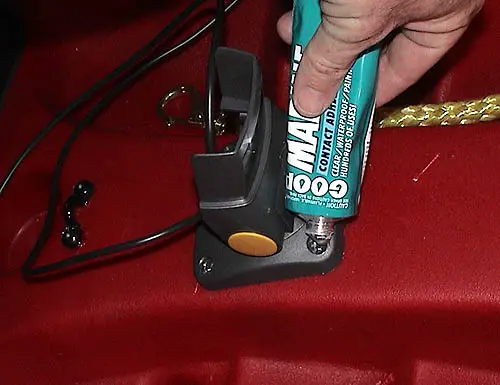

If you have a quick-release mount, you can fix the fish finder on it and you are done with this part. If the fish finder is more permanently affixed to the mount, you might have to struggle to pour sealant around the cable hole.
3. Routing The Power Cables
Wiring up marine electronics is a whole science in itself. There are two major ways of powering the fish finder: cranking battery and fuse blocks.
Connecting it to the Cranking Battery
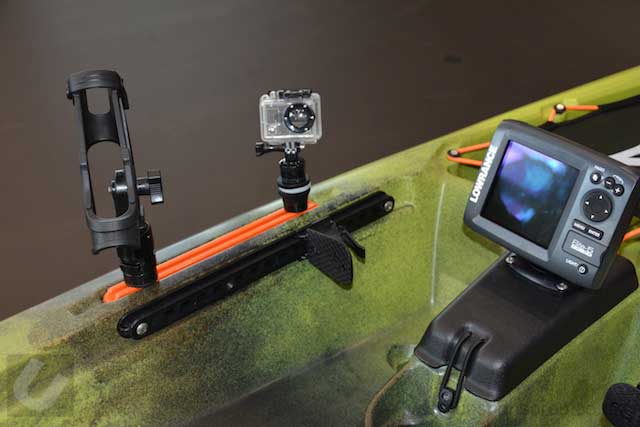

Many official sources recommend connecting to the starting or cranking battery of the vessel. This is the battery that provides short bursts of power for the ignition switch to be activated and the engine of the vessel to start. Once the boat starts, it requires continuous energy which is provided by a separate trolling motor battery.
Most of the light electronics with low power draw are connected to the cranking battery directly with inline fuse.
PROS | CONS |
|---|---|
- Folks who support battery connection argue that this reduces the chance of interference from other electronics devices compared to the fuse blocks. - This is, in fact, true only if you connect the high draw equipment like electric downriggers to the trolling motor battery. | - Connecting multiple electronic gadgets directly to the cranking battery makes it all a little messy. - In case a fuse is blown, you have to check out all the inline fuses to find which one is trashed. - The location of the battery and all these gadgets may require you to unnecessarily run long wires along your vessel which is an eyesore and somewhat dangerous affair. |
Fuse
The trick to keeping the battery and battery-powered equipment like fish finders safe is to install an inline fuse. In case there’s a power short, the fuse blows and protects the electronics devices. The inline fuse should be installed on the positive lead as close to the battery as possible.
This way, in case of a short, only the piece of cable between the battery and the fuse will be fried. And the rest will remain intact.
Choice of Cable
Hooking up the fish finder directly to the battery works well only if you use the right gauge of cable to connect the two. This depends on the length of cable required to connect the two and the amp draw of the fish finder. Here’s a graphic that helps select the correct wire gauge for proper bright visuals on the fish finder.
Connecting to the main or accessory fuse blocks
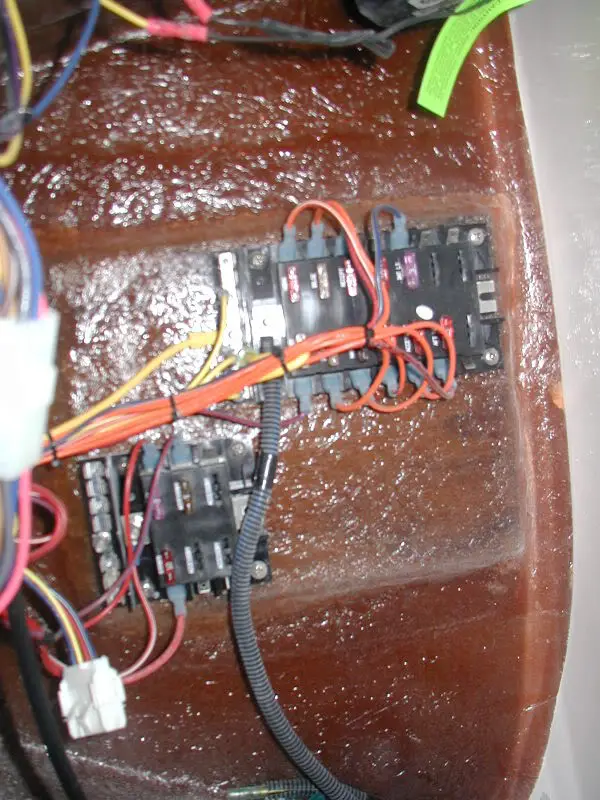
Most boats now come equipped with at least one fuse block. Below you will see two fuse blocks. The main fuse block is left for important devices. The smaller ones like the one below can be used to hook up accessories with low draw like the fish finder.
A fuse block can be used to distribute power amongst the various circuits on the vessel.

PROS | CONS |
|---|---|
- An organized angler may have 2-3 fuse blocks installed in different regions of the vessel and may connect the gadgets installed in those areas to the closest block. - Not only is this less messy, it allows you to troubleshoot quickly by immediately identifying which fuse block the short occurs on. | - Experienced anglers complain that devices connected to fuse blocks show interference with one another and disrupt the display of the fish finder. Yet, pro-fuse block anglers argue that it cannot cause any more interference than multiple leads connected to a battery post directly |
Fuse Selection
Check out the electricity draw of your fish finder. Usually fish finders draw 1.5A and require a 3A fuse while larger fish finder/chartplotters draw around 3.5A and require a 7A fuse.


Installation
The best way to use additional fuse blocks is to connect them to the cranking battery. You can use marine-grade fuse holders at the battery to protect these connections.
Experts use marine-grade dual-conductor wire to connect battery and fuse so that you don’t have to run separate wires for positive and negative leads. These dual cable also have a protective covering which fares well against chafing and external elements.
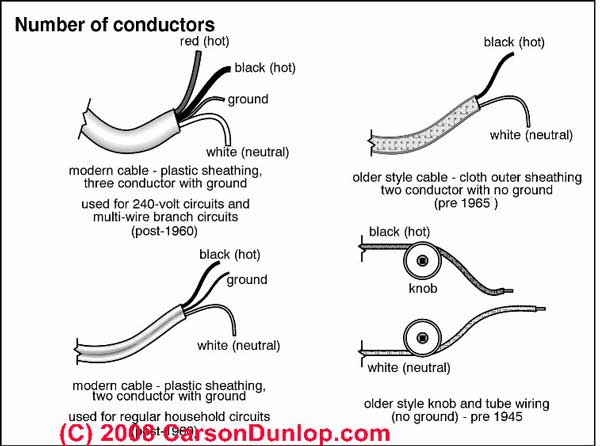
For the fish finder, we suggest mounting a fuse block under the console. Use stainless steel nuts and bolts in the process. Choose such a location to mount the fuse boxes that they are protected from the elements but accessible for repair.
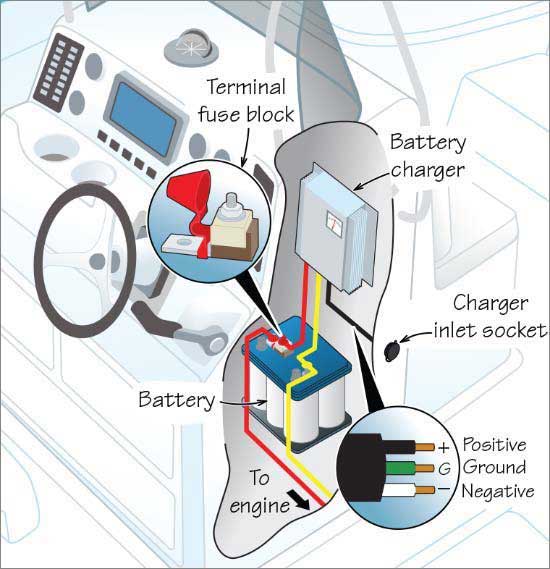
Once you decide whether you will connect the fish finder to the cranking battery or the fuse block, run the wire down to the destination. Secure the cable every 20 inches with zip ties, existing wire chase or clamps.
Try to keep a respectable distance between your wiring and the trolling motor wires as these can cause interference.

We recommend spending some time and resources to setup fail-free wiring in the first go. Wire splice shouldn’t be soldered. Instead use crimped barrel connectors and protect with adhesive-lined shrink tubing.
Alternatively, liquid electrical tape can be used. Protect the fuse block connections with the same tape and dielectric grease.

Important note: Do not connect the power terminals to the battery or fuse block until you are finished working on the wiring.
4. Installing transom mount and transducer
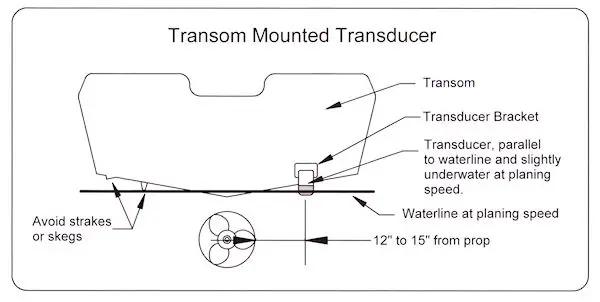
The next step is to set up the transducer in place. Transom mount is one of the cheapest options and usually accompanies every fish finder. This mounting does well only at lower speeds (less than 30 mph) and for vessels less than 30 feet.
Position
The transom mount should be placed such that the transducer just submerges in the water at planing speed. The transducer should be mounted parallel to the ground. It should extend 1/8” below fiberglass hulls or 3/8” below aluminum hulls. To find the right spot, look down the transom.
Check that there are no protrusions around the location. The mount should be positioned away from the propeller. The transducer should not in the stream of turbulence from the propeller.
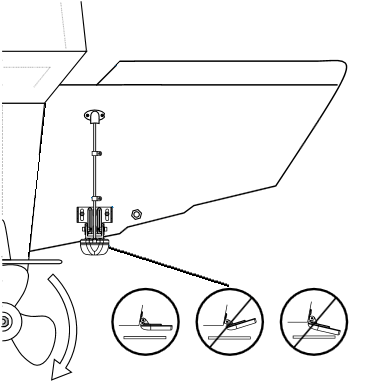


Once you locate the spot, you must hold the bracket over the transom and mark the holes to fasten the mount.
Wiring
Route the wires from the transducer to the helm near the fish finder. Again, they should be soft-clamped every 20 inches and extra wire should be coiled under the helm. The manufacturer will provide a diagram with the fish finder to make the necessary connections.
Installing the mount
Drill holes on the marking made for the transom mount. Squirt generous amounts of silicone sealants on this. Fix and adjust the position of the mount such that the transducer will perfectly horizontal to the ground on it.
You can temporarily place the transducer to check this. Also seal the nuts and bolts of the mount again with the sealant. This prevents water from getting into the transom via the transducer mounting.
This moisture may rot the core of the boat, so be extra cautious in sealing.
5. Test Run
We suggest at least 4 days’ time for the sealant to dry and seal out the holes from where moisture can enter the electrical connections or the core of the vessel. Once the sealant dries out, it’s time to take the fish finder out fishing.
- If you followed all the steps correctly, you should get the signal immediately without any hassles.
- If you aren’t getting any signal, probably the transducer isn’t reaching under water.
- If the images hold strong, it’s time to bring out the beer and the bait.
Pro Tips:
- Places where heat-shrink tubing cannot be applied, brush some liquid electrical tape to protect the connections.
- Do not cut the transducer wires to required size. This will introduce additional resistance in the line and impede the SONAR detection of the fish finder.
We hope you found all the help you needed in this tutorial on how to install a fish finder and transom mount. This is meant to be comprehensive resource on mounting, wiring and connecting the fish finder and its transducer.
If we were thorough let us know in the comments. You can also post your questions, if any. Share this post with fellow anglers to help them out!
My name is Alex D. Allen, and I’m a professional fishfinder researcher and fishing enthusiast. You’re probably on my website in search of a fishing device that can help make your experience a lot easier and more productive; or perhaps, just trying to glean information to get a wider understanding of what fish finders are and how they can benefit you. Whatever your purpose may be, you’ve come to the right place.
